If you are searching for a dessert that is tasty, easy and everyone will love, then there is no better option than Chocolate Ripple Cake. This classic no-bake cake has been gracing family gatherings, festive occasions, and informal dinners for several decades. Why is it so popular? It is quite simple, beautiful, and the combination of cookies and cream makes it unique, standing out among the rest. Within this in-depth guide, we will learn recipes, pro tips, exciting variations, and more.
what make chocolate ripple cake special
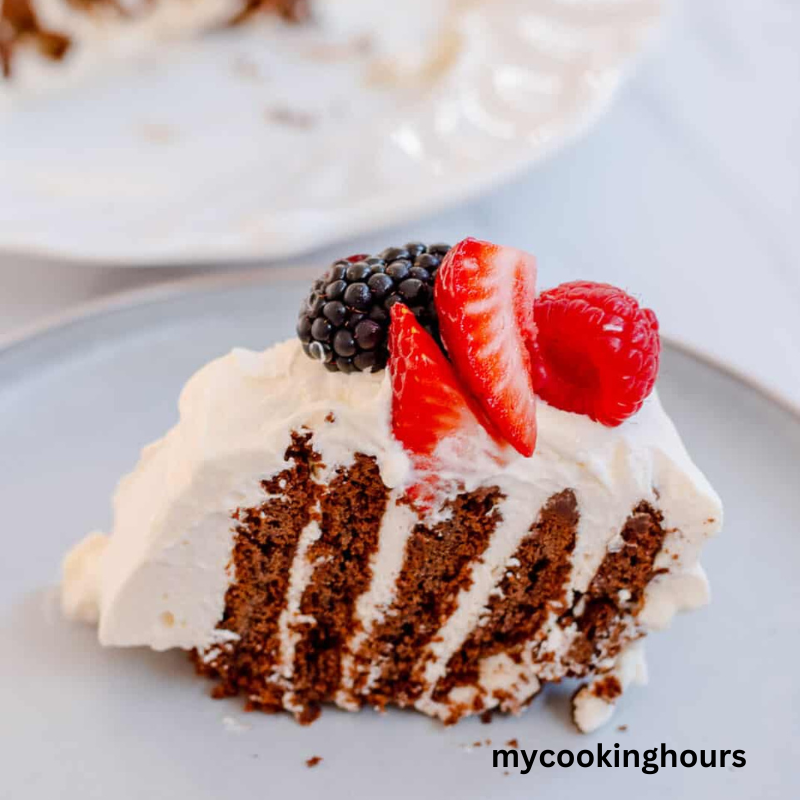
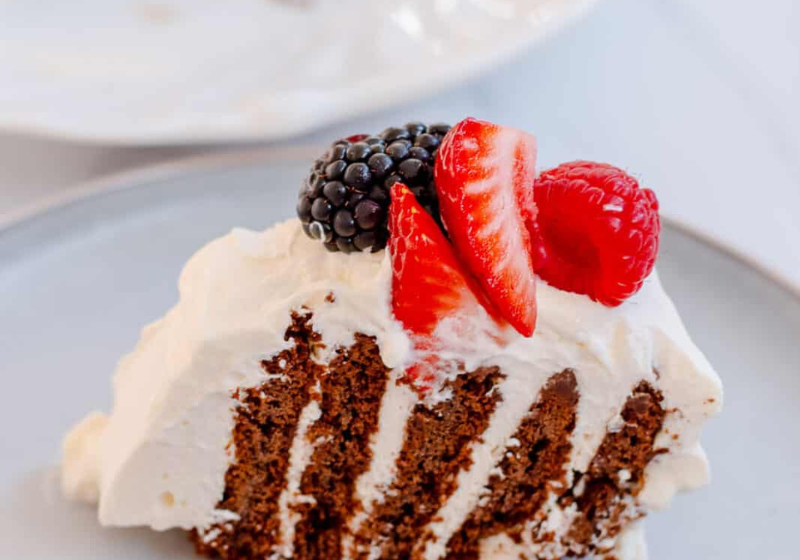
Chocolate Ripple Cake is more than just a dessert-it is an experience. The magic behind this treat is in its simplicity. Chocolate cookies are layered together with whipped cream, and over time, the cookies soften and become the equivalent of a cake’s texture. After all, the result is such a silky, melt-in-your-mouth treat that tastes fabulous without baking or complicated techniques.
Ingredients for chocolate ripple cake
1. Chocolate Ripple Biscuits: Arnott’s Choc Ripple biscuits are the go-to option in Australia. If unavailable, any firm chocolate biscuit will work.
2. Heavy Whipping Cream (500ml): Fresh, high-quality cream is essential for the best texture and flavor.
3. Vanilla Extract (1 teaspoon): Enhances the cream’s flavor with a subtle sweetness.
4. Optional Sweeteners: 2 tablespoons of sugar, if desired, for a sweeter whipped cream.
How to make chocolate ripple cake
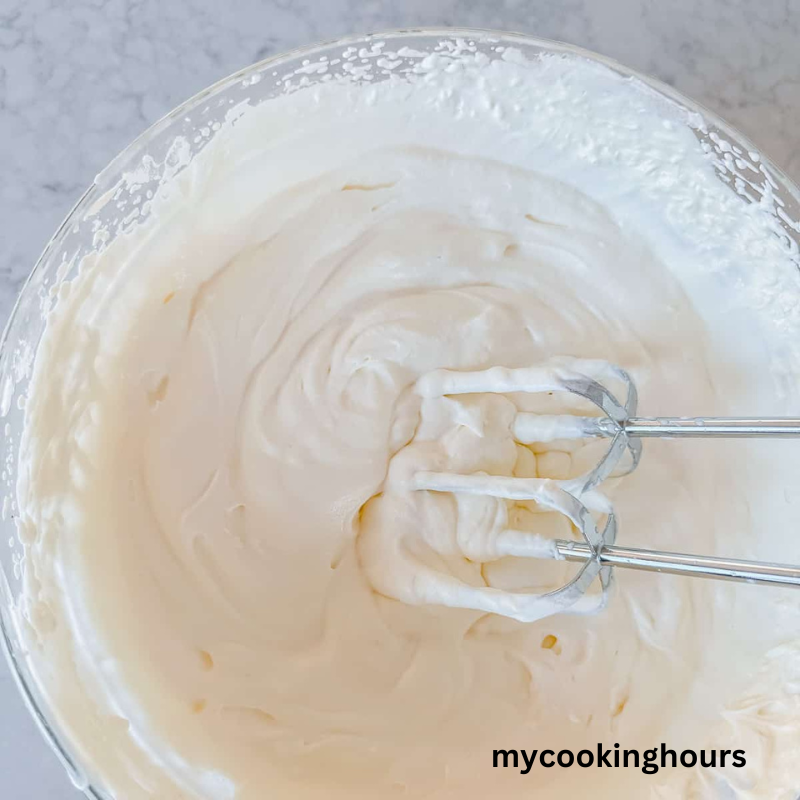
Step1: Prepare the whipped cream
First, whip the cream in a chilled bowl. Add the vanilla extract (and sugar, if using) and whip until stiff peaks form. This ensures that the cream holds its shape and binds the cookies effectively. Avoid over-whips, as this can lead to a grainy texture of the cake.
Step2: Assemble the cake
Spread a very thin layer of whipped cream on your serving plate to decorate the cake. Take two biscuits and place sandwiched with the whipped cream upright in the plate. Repeat the process in order to form a log. Spread the remaining cream evenly on the biscuits so that it would be completely covered.
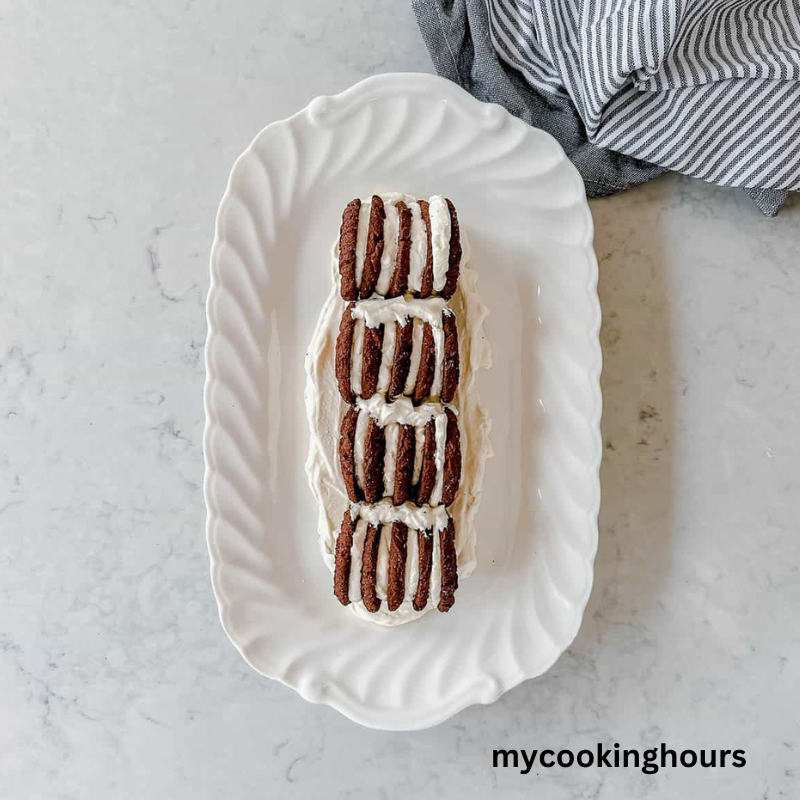
Step3: Chill and Set
Place the assembled cake in the refrigerator for at least 6 hours, but it is better to let it sit overnight. At this point, the biscuits absorb the moisture from the cream and become soft like a cake.
Step4: Decoration and serving
Just before serving, garnish with grated chocolate, cocoa powder, or any fresh fruit of your choice. Then slice it with a sharp knife by cutting it diagonally to bring out that visually appealing layered appearance.
Why you’ll love this cake
No Oven Required: This is perfect for hot days or when there isn’t a lot of time.
Easy To Customize itself: Add flavors, toppings, or layers to suit any occasion.
Convenience of preparation: The better it tastes when stored in the refrigerator for a long period of time makes this the prep-ahead dessert.
Universal appeal: It is absolutely relished by kids and adults alike with its rich flavor of chocolate and creamy texture.
Pro tips for chocolate ripple cake
Chill your equipment: A chilled bowl and whisk make whipping the cream more effortless and faster.
Even layers: Spread the cream evenly between the cookies to get an even texture.
Flavor experiments: For adults, add a few drops of liquor, like Baileys or Kahlua, to the cream.
Patience is golden: Give the cookies enough time to soften in the fridge; this is the most important step to get the specific texture.
Variation for chocolate ripple cake
While the true recipe is heavenly, incorporating your own creativity can really bring this cake to the next level. Here are some fun variations to try:
- Ripple Cake with Espresso Mocha
Add one teaspoon of instant coffee dissolved in hot water to the whipped cream. Garnish with chocolate-covered coffee beans for that finishing touch. - Fruity Ripple Cake
Place fresh strawberries, raspberries, or banana slices on the cake. Fruits add a refreshing contrast to the rich cream. - Mint-Chocolate Ripple Cake
Add a few drops of peppermint extract to the cream and sprinkle crushed mint candies on top. - Nutty Delight
Add finely chopped hazelnuts or almonds to the cream. Top the cake with a drizzle of Nutella or chocolate sauce. - Cheesecake-Inspired Ripple Cake
Add softened cream cheese to the whipped cream for added tang. This complements well with the crumb topping made from the graham crackers. - Vegan Chocolate Ripple Cake
Use plant-based cookies and use whipped coconut cream instead of dairy cream. Ideal for special diets.
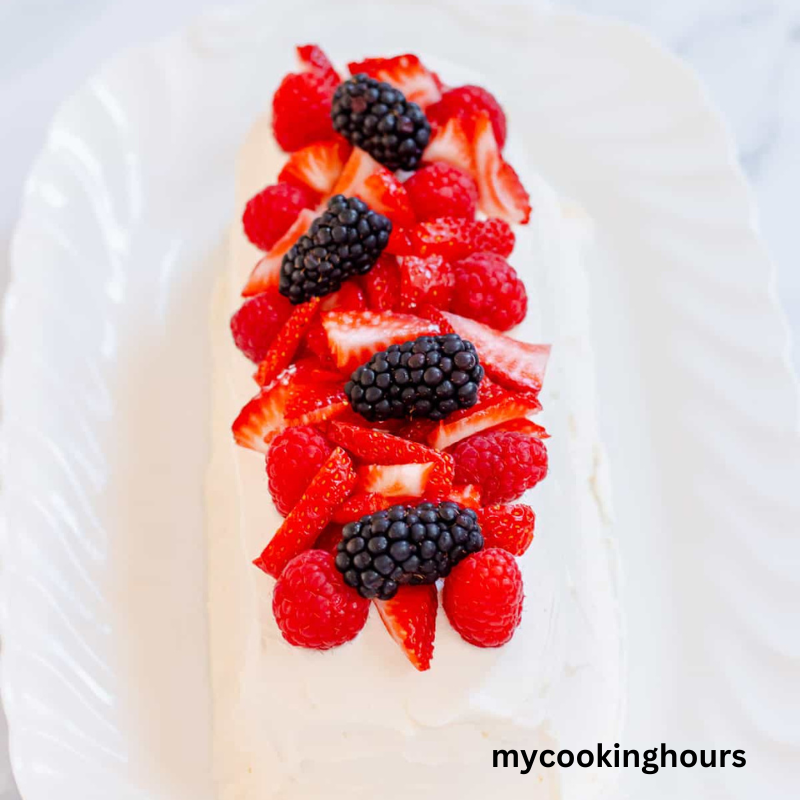
Decorating idea to elevate your cake
Presentation is everything! These decoration ideas for a casual dinner or a festive celebration would surely impress your guests:
1. Classic Elegance : Dust with cocoa powder or powdered sugar.
2. Festive Glam: Sprinkle edible glitter or colorful sprinkles for the holidays.
3. Chocolate Heaven: Top with chocolate curls, shavings, or a drizzle of ganache.
4. Seasonal Flair: Add seasonal toppings such as crushed candy canes during Christmas or edible flowers in spring.
The history behind chocolate ripple cake
The chocolate ripple cake is an Australian dessert, made famous through Arnott’s Choc Ripple biscuits. This dessert likely rose to fame in the mid-20th century, when convenience and no-bake recipes were all over the map. It has endured because it’s adaptable and very nostalgic.
Nutritional breakdown
Here’s a general estimate of the nutritional content per serving:
| Nutrient | Amount Per Serving |
|---|---|
| Calories | 300-350 |
| Protein | 3g |
| Fat | 25g |
| Carbohydrates | 20g |
| Sugar | 12-15g |
Keep in mind that these values vary based on the specific ingredients used and portion sizes.
Serving suggestion for chocolate ripple cake
Make it perfect with these serving ideas for your chocolate ripple cake:
1. Pair It with Ice Cream: A scoop of vanilla or chocolate ice cream is a perfect match.
2. Add a sauce: Caramel, berry compote, or melted chocolate add a decadent touch.
3. Enjoy With Coffee: The cake will be all the more enjoyable with a bold espresso or latte.
Frequently asked questions (FAQs)
1. Can I prepare this cake ahead?
Yes! Actually, this cake tastes better if done a day ahead because the cookies will have extra time to soften.
2. I didn’t have chocolate ripple biscuits. Can I use something else?
You can actually use any firm cookie that has chocolate flavor to it. You can use Oreos without the filling, digestive biscuits, or graham crackers.
3. How long can I keep the chocolate ripple cake?
It can be stored in the refrigerator up to 3 days. After that, it becomes soft.
4. Can I freeze chocolate ripple cake?
Yes, you may wrap it tightly in plastic and store it in the freezer up to a month. Thaw in the fridge before serving.
5. Is it suitable for kids?
Absolutely! Just avoid using alcohol or strong coffee flavors in the cream.
Conclusion
Chocolate Ripple Cake is one of those desserts that takes all of the nostalgia, convenience, and indulgence and wraps it up together in one delicious package. Whether you stick with the tried-and-true traditional recipe or make some creative changes, this no-bake dessert has got to bring compliments to everyone who tries it. So get your favorite chocolate cookies and your fresh cream ready; magic happens.
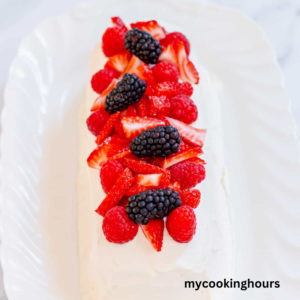
Chocolate Ripple Cake
Ingredients
- 1 packet chocolate ripple cookies
- 2 cups heavy whipping cream
- 1 teaspoons vanilla extract
- 2 tablespoon sugar
Instructions
- Step1: Prepare the whipped creamFirst, whip the cream in a chilled bowl. Add the vanilla extract (and sugar, if using) and whip until stiff peaks form. This ensures that the cream holds its shape and binds the cookies effectively. Avoid over-whips, as this can lead to a grainy texture of the cake.
- Step2: Assemble the cakeSpread a very thin layer of whipped cream on your serving plate to decorate the cake. Take two biscuits and place sandwiched with the whipped cream upright in the plate. Repeat the process in order to form a log. Spread the remaining cream evenly on the biscuits so that it would be completely covered.
- Step3: Chill and SetPlace the assembled cake in the refrigerator for at least 6 hours, but it is better to let it sit overnight. At this point, the biscuits absorb the moisture from the cream and become soft like a cake.
- Step4: Decoration and servingJust before serving, garnish with grated chocolate, cocoa powder, or any fresh fruit of your choice. Then slice it with a sharp knife by cutting it diagonally to bring out that visually appealing layered appearance.
More recipes:-


2 Replies to “Chocolate Ripple Cake : The Ultimate No-Bake Delight”